Driving with children abroad starts with a matching exercise, not a country table. The child’s height and weight, the seat’s approval mark, the rental car’s seating positions, the airline’s policy and the destination’s law must agree. A seat that is legal at home may need a different approval or attachment method abroad.
Use the international driving permit guide, road-trip packing list and car-rental insurance guide for the document, equipment and cover layers. The Japan and Australia pages show how to apply the same source-first method.
Start with the rule that applies to this trip
Separate legal minimum from a safer setup
Road rules set a minimum. The safer setup may keep a child rear-facing for longer, use the back seat, or choose a seat that leaves more room for a winter coat and harness adjustment. Do not copy an age or height threshold from a different country. Record the destination, the child’s current measurements, the seat model and the vehicle class on one worksheet.
Build an authority-first source chain
Start with the destination road-safety authority, then check the rental company and seat manufacturer. EU travel guidance warns that member states can differ on child restraints and belts. NHTSA’s age-and-size document is a US safety recommendation; state law remains a separate check.
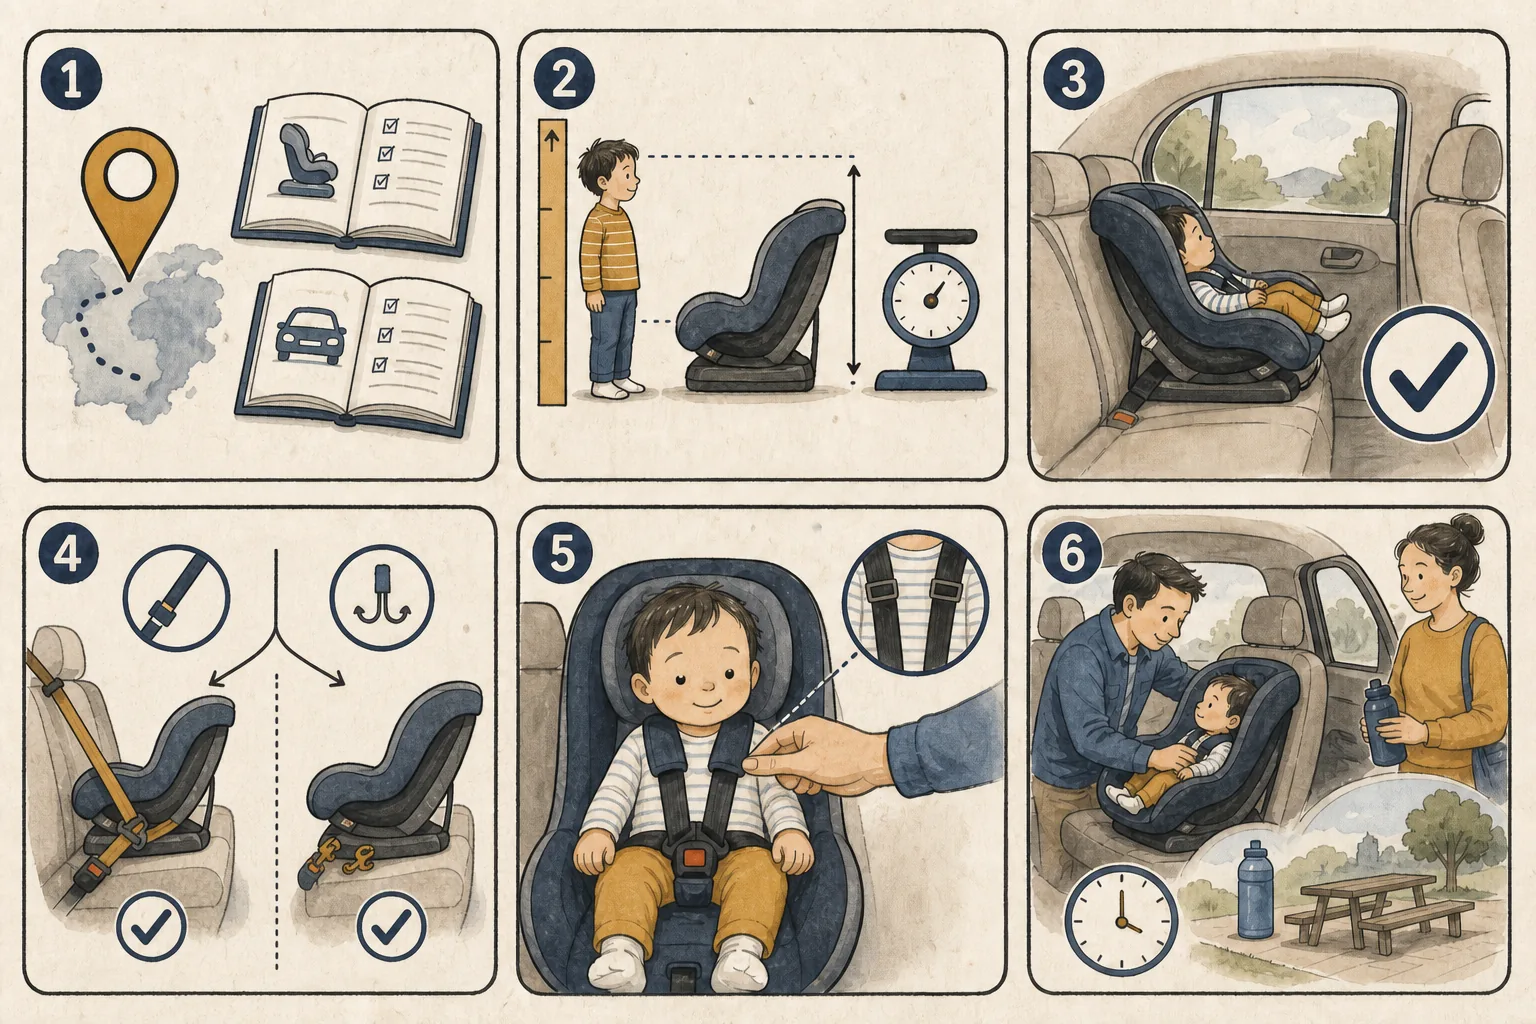
Read the rule, match the seat, fit it, then plan stops. Click to enlarge.
Match the child, seat and vehicle
Read the label and both manuals
Write down the child’s height, weight and clothing for the travel date. Compare those figures with the seat’s permitted range, orientation and harness limits. Read the vehicle manual for approved rear-seat positions, ISOFIX or lower-anchor locations, top-tether routing and belt-locking instructions.
Check the actual seating position
The back seat is the usual starting point. A rear-facing seat placed in front of an active passenger airbag can be dangerous. EU road-safety guidance says the airbag must be deactivated when a rear-facing restraint is used in a front seat. Follow the rental car’s switch instructions and the local rule; if the status is uncertain, move the seat to the rear and ask the branch.
Use one attachment method exactly as the manuals describe. Do not combine lower anchors and a seat belt unless both manufacturers expressly allow it. Check that the shell sits at the permitted angle, the harness lies flat, the buckle is closed and the child’s coat is not creating hidden slack. Ask a trained fitter or the rental branch to inspect the installation when the model is unfamiliar.
Use examples without turning them into global law
European routes
The European Commission describes a size-based rule: children under 1.35 metres need an approved device suited to their size and weight, while taller children may use the adult belt when it fits. Countries add details. i-Size or R129 is a seat-approval framework, not a promise of one age, height or taxi rule. Check the country page and the rental car’s registration.
United States and New South Wales
NHTSA recommends rear-facing travel for as long as the seat’s height and weight limits allow, then a forward-facing harness and later a booster until the belt fits. It also recommends the back seat through at least age 12. These are safety recommendations; state law and the rental company’s supplied seat require separate checks.
New South Wales shows why copying a table fails. Its official fitter manual describes different approved restraints for infants under six months, children from six months to four years and children from four to seven years. Another state or vehicle may differ. For Japan, New Zealand, Canada or any other destination, open the current authority page and ask the branch which approved seat it can provide.
Choose rental, bring, or fly with the seat
Inspect a rental seat at the counter
Reserve the seat with the child’s height and weight, rather than an age label alone. At pickup, photograph the model and approval label, check the harness and buckle, look for cracks or missing pads, and ask about expiry or service information. Fit it before leaving; if the branch cannot identify the model or instructions, request another seat or car.
Bring your own seat with a documented plan
Your own seat has a known history and familiar harness adjustment. Confirm destination approval and a compatible rental-car belt or anchor position. Protect it in a marked travel bag, and keep the manual or manufacturer installation diagram with the seat.
EASA advises that a child seat used on an aircraft must be approved for aircraft use, and the airline controls seat width, location and booking conditions. Ask before the flight about a purchased seat, window-seat placement and whether the carrier accepts the specific model. A car seat that travels in the cabin still needs to be legal and correctly fitted in the rental car after landing.
Install and check before moving
Run a passenger-side fit check
Have a second adult read the manual aloud while the other installs. Push the seat into the vehicle cushion as instructed, route the belt or connectors through the marked path, attach the top tether when required and remove slack. Test the installation at the belt path using the seat manufacturer’s movement limit. Check the harness at the child’s shoulders and hips, then close the door without trapping straps.
Lock the setup before the first kilometre
Photograph the installed seat, the visible approval label and the dashboard airbag setting. Save the car model, registration and branch phone number. Recheck after the first stop, after a change of vehicle or after removing a coat. Loose toys, tablets and bottles should be secured; a hard object in the cabin can become a projectile during a sudden stop.
Plan a family route around the whole journey
Schedule daylight and reachable breaks
Plan the longest stage around a toilet, shade, food and a safe place to stretch. A two-hour interval is a planning prompt; conditions may require earlier stops. Never leave a child alone in a parked vehicle. In hot weather, keep water within reach while parked legally.
 Family kit for heat, cold and distance from help. Photo by Oregon Department of Transportation via Wikimedia Commons, CC BY 2.0.
.jpg)
Keep navigation and comfort within the plan
Download maps, save the accommodation address in the local script and mark fuel or charging stops before moving. A passenger can manage changes while the driver stays focused. Pack spill-resistant water, familiar food, clothes and comfort items. Ask a pharmacist or clinician about medicines for a particular child; do not guess a dose online.
 Set the route while parked and let the passenger handle the screen. Photo by Shixart1985 / Nenad Stojković via Wikimedia Commons, CC BY 2.0.

Handle taxis, rideshares and flight connections
Ask about the vehicle before booking
Taxi and rideshare exemptions vary by destination and may cover only specific journeys. An exemption does not make an unrestrained child safer. Ask for the vehicle, seat type, installation method and pickup time. Leave enough time to reject a car without the promised restraint.
Keep an emergency contact card
Write the child’s name, allergies, relevant conditions, guardian contacts, accommodation and local emergency number on paper and in an offline phone note. Add the rental breakdown number. The card gives responders context after a crash, illness or lost phone.
 Keep warning equipment accessible. Photo by Santeri Viinamäki via Wikimedia Commons, CC BY-SA 4.0.

Family departure worksheet
- ☐ The authority and branch confirmed the rule, seat approval and permitted position.
- ☐ The child’s height and weight match the seat label and harness range.
- ☐ Seat and vehicle manuals agree on the belt, ISOFIX or lower-anchor method.
- ☐ Rear-facing use, airbag status and back-seat placement are checked.
- ☐ Rental-seat model, damage, expiry or service information and fitting help are recorded.
- ☐ Airline approval, seat width and booking conditions are confirmed for cabin use.
- ☐ Maps, breaks, shade, toilets, fuel or charging and a shorter first stage are planned.
- ☐ Water, food, clothing, comfort items, documents and the contact card are reachable.
- ☐ Loose objects are secured and the child is comfortable before moving.
- ☐ The installed seat and airbag setting are photographed and rechecked after the first stop.
Sources and review date
This guide was reviewed on August 17, 2026. Child-restraint laws, approval systems, airline policies, rental fleets and road conditions change. Reopen the destination authority, seat and vehicle manuals, airline policy and rental contract for the exact route and travel date.
- European Commission: children and road safety
- Your Europe: road rules and safety
- US NHTSA: child passenger safety recommendations
- Transport for NSW: child restraint fitters manual
- EASA: travelling with children and child seats
- European Commission: seat belts and child restraints